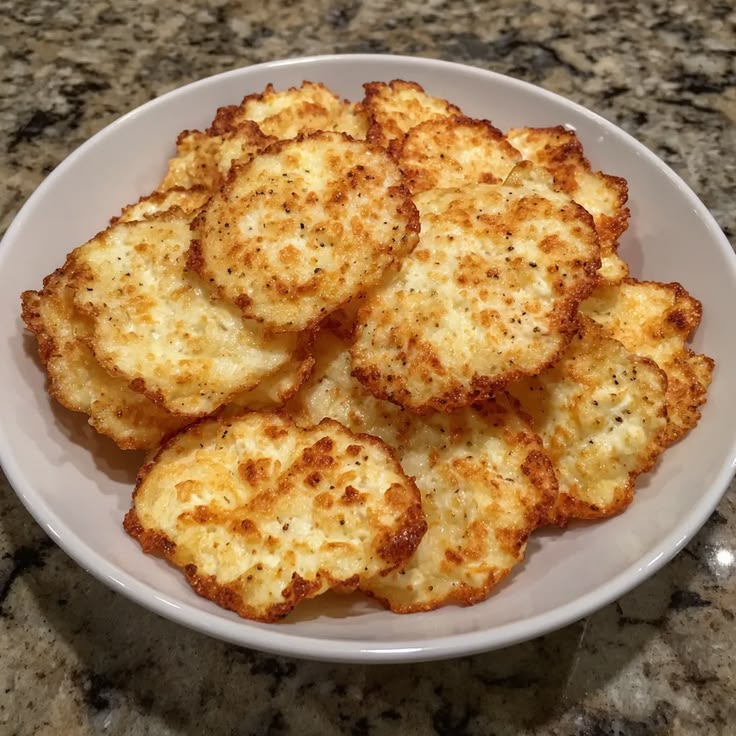
Crunchy Cottage Cheese Chips | High Protein Snack
What if your favorite crunchy snack could actually fuel your muscles instead of sabotaging your diet? Most people assume chips are off-limits when eating healthy — but that’s about to change. Cottage Cheese Chips are the revolutionary, protein-packed snack you never knew you needed. Crispy, satisfying, and incredibly simple to make, these chips are redefining what guilt-free snacking looks like in 2024.
Whether you’re following a high-protein diet, cutting carbs, or simply looking for a smarter snack, this recipe delivers on every front. Let’s dive into exactly how to make them perfectly every single time.
Why You’ll Love This Recipe
These chips are not just a trend — they’re a game-changer. With minimal ingredients and maximum crunch, they satisfy that salty, crispy craving without the processed junk. Each batch takes less than 30 minutes and requires zero special equipment beyond a baking sheet.
They’re naturally gluten-free, low-carb, and loaded with protein. If you’ve been searching for a snack that works as hard as you do, you’ve officially found it. Even picky eaters and snack skeptics become instant fans after the first bite.
Ingredients List
You only need a handful of pantry staples to pull this recipe together. The beauty of Cottage Cheese Chips lies in their simplicity — fewer ingredients means more room to customize and experiment with flavors you love.
- 1 cup full-fat cottage cheese — Full-fat delivers the best texture and crispiness. Low-fat versions work but may yield slightly softer chips.
- ½ teaspoon garlic powder — Adds a savory depth. Substitute with onion powder for a milder flavor.
- ½ teaspoon smoked paprika — Brings a subtle smokiness. Regular paprika or chili powder works as an alternative.
- ¼ teaspoon sea salt — Enhances all the flavors. Himalayan pink salt is a great swap.
- ¼ teaspoon black pepper — Adds a gentle kick. Omit if sensitive to spice.
- Optional: 1 tablespoon grated Parmesan — Boosts cheesy flavor and extra crunch. Nutritional yeast works for a dairy-free alternative.
- Optional: Fresh or dried herbs — Try rosemary, thyme, or Italian seasoning for elevated flavor profiles.
Pro Tip: Drain your cottage cheese through a fine mesh strainer or cheesecloth for 10–15 minutes before using. Removing excess moisture is the single most important step for achieving maximum crunchiness.
Timing
One of the biggest advantages of this recipe is how quickly it comes together. Here’s a full breakdown of the time commitment involved:
- Prep Time: 10 minutes (including optional draining)
- Cook Time: 25–30 minutes
- Cooling Time: 5–10 minutes
- Total Time: Approximately 45 minutes
That’s roughly 40% less time than the average homemade chip recipe, which typically runs 60–75 minutes with prep and cooling. You’ll have a fresh, hot batch of Cottage Cheese Chips ready before your favorite show’s opening credits finish rolling.
Step-by-Step Instructions
Follow these steps carefully for the crispiest, most flavorful results. Don’t rush the process — each step plays a critical role in the final texture.
Step 1: Preheat Your Oven
Preheat your oven to 375°F (190°C). Line a large baking sheet with parchment paper or a silicone baking mat. Avoid using aluminum foil directly, as chips may stick and tear when removing them.
Step 2: Drain the Cottage Cheese
Place cottage cheese in a fine mesh strainer over a bowl. Let it drain for at least 10 minutes, pressing gently with a spoon to remove excess liquid. The drier your cottage cheese, the crunchier your chips will be — this step is non-negotiable for best results.
Step 3: Season and Mix
Transfer the drained cottage cheese to a mixing bowl. Add garlic powder, smoked paprika, salt, black pepper, and any optional add-ins like Parmesan or herbs. Stir thoroughly until all seasonings are evenly distributed throughout the mixture.
Step 4: Portion the Chips
Using a tablespoon or small cookie scoop, drop portions of the seasoned mixture onto your prepared baking sheet. Space them at least 2 inches apart. Using the back of the spoon, flatten each mound into a thin, even circle approximately 2–3 inches in diameter.
Tip: Thinner circles = crunchier chips. Aim for about ⅛-inch thickness for optimal results.
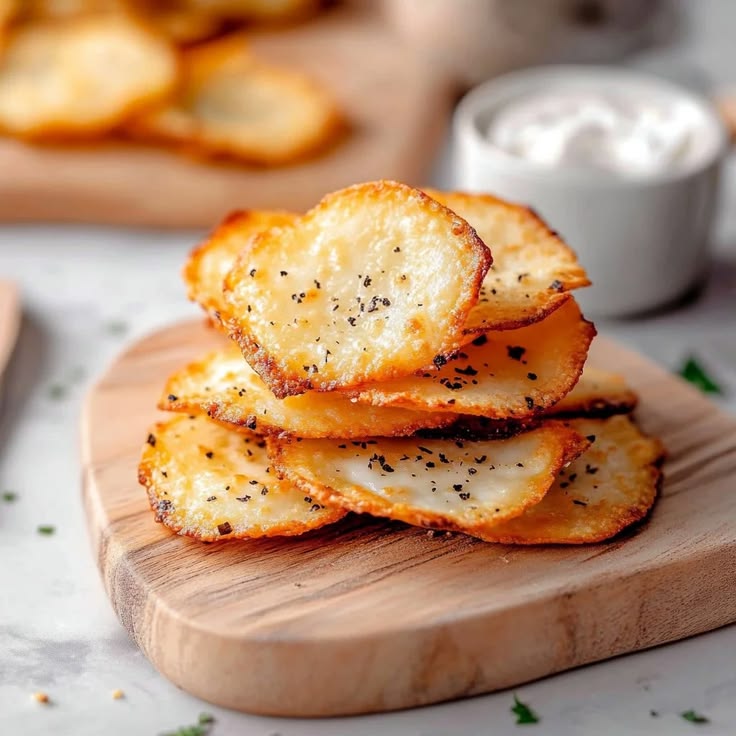
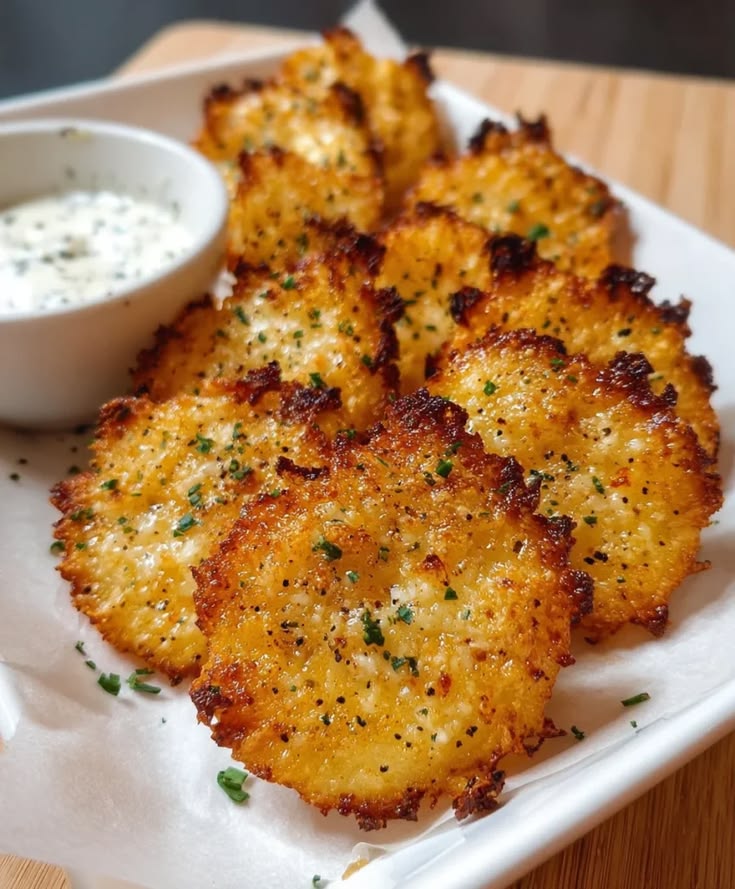
Step 5: Bake to Golden Perfection
Place the baking sheet in the preheated oven. Bake for 25–30 minutes, checking at the 20-minute mark. Chips are done when the edges are deep golden brown and the centers look dry and set. They will continue to crisp up as they cool, so don’t overbake.
Step 6: Cool Before Serving
Remove the baking sheet from the oven and allow chips to cool on the pan for 5–10 minutes. This cooling period is essential — it’s when the chips firm up and develop their signature crunch. Transfer to a wire rack if available for maximum air circulation.
Nutritional Information
These chips aren’t just delicious — they’re nutritionally impressive. Here’s the estimated breakdown per serving (approximately 10–12 chips, made from 1 cup of cottage cheese):
- Calories: 110–130 kcal
- Protein: 14–16g
- Total Fat: 5–6g
- Saturated Fat: 2.5g
- Carbohydrates: 3–4g
- Fiber: 0g
- Sugar: 2g (naturally occurring from dairy)
- Sodium: 380–420mg
- Calcium: 15% Daily Value
For comparison, a standard serving of regular potato chips contains roughly 150 calories, 10g of fat, and less than 2g of protein. These Cottage Cheese Chips deliver 7–8 times more protein per serving — a staggering nutritional upgrade that doesn’t sacrifice flavor or satisfaction.
Cottage cheese is also a natural source of casein protein, which digests slowly and keeps you feeling full longer. It’s an ideal snack for post-workout recovery or curbing afternoon hunger cravings.
Healthier Alternatives for the Recipe
This recipe is already a High Protein Snack powerhouse, but there are several ways to customize it further based on your dietary goals and preferences.
- Dairy-Free Version: Use a high-quality, firm dairy-free cottage cheese alternative made from cashews or almonds. Results may vary slightly in texture but are still delicious.
- Lower Sodium Option: Skip the added salt entirely and rely on herbs and spices for flavor. This can reduce sodium by up to 40%.
- Extra Protein Boost: Stir in one tablespoon of unflavored whey or collagen protein powder before baking. It blends seamlessly and adds an extra 3–5g of protein per serving.
- Keto-Friendly: This recipe is already naturally keto-friendly. Add a pinch of cayenne pepper and extra Parmesan for a bold, keto-approved flavor bomb.
- Veggie-Infused: Mix in one tablespoon of finely chopped sun-dried tomatoes or spinach for added micronutrients and a pop of color.
- Everything Bagel Style: Replace individual seasonings with 1 teaspoon of Everything Bagel seasoning for a crowd-pleasing flavor that works for all ages.
Serving Suggestions
These crispy bites are incredibly versatile. Serve them as a standalone snack, or elevate them into something truly special with these creative pairing ideas:
- With Dips: Pair with guacamole, hummus, tzatziki, or a spicy salsa for a satisfying snack board centerpiece.
- As a Salad Topper: Crumble a few chips over a Caesar or Greek salad in place of croutons for a protein-rich crunch.
- Charcuterie Board Addition: Arrange chips alongside cured meats, olives, and fresh vegetables for an impressive entertaining spread.
- Soup Accompaniment: Serve alongside a warm bowl of tomato soup or lentil soup for a satisfying, complete meal experience.
- Kids’ Snack Plate: Pair with sliced fruit, string cheese, and apple slices for a balanced, kid-approved after-school snack.
- Pre-Workout Fuel: Enjoy a small handful 30–45 minutes before exercise for a light, protein-rich energy source that won’t weigh you down.
Common Mistakes to Avoid
Even simple recipes have their pitfalls. Avoid these common errors to ensure your chips turn out perfectly crispy every single time:
- Skipping the Draining Step: This is the number one mistake beginners make. Wet cottage cheese produces soggy, rubbery chips instead of crispy ones. Always drain thoroughly.
- Making Chips Too Thick: Thick portions take longer to dry out and often remain chewy in the center. Aim for thin, even circles for consistent crunch throughout.
- Overcrowding the Baking Sheet: Chips need space for air to circulate. Crowding causes steaming instead of baking, resulting in soft, disappointing texture.
- Removing Chips Too Early: Pale chips are not done chips. Wait until edges are deeply golden before pulling them from the oven. They should look almost over-done to achieve proper crunch.
- Not Allowing Proper Cooling Time: Eating chips straight from the oven is tempting but counterproductive. The cooling period is when crispiness fully develops — patience pays off here.
- Using Non-Stick Spray Instead of Parchment: Cooking spray can cause uneven browning and sticking. Parchment paper or a silicone mat ensures clean, easy removal every time.
- Ignoring Oven Variations: Every oven runs slightly differently. Start checking your chips at the 20-minute mark and adjust timing based on your specific oven’s behavior.
Storing Tips for the Recipe
Proper storage is key to maintaining that satisfying crunch you worked hard to achieve. Here’s how to keep your chips fresh and crispy:
Room Temperature Storage: Store fully cooled chips in an airtight container at room temperature for up to 3 days. Place a small food-safe silica gel packet or a piece of dry bread inside the container to absorb any residual moisture.
Refrigerator Storage: While refrigeration extends shelf life to about 5 days, it can introduce moisture and soften the chips. If you must refrigerate, re-crisp them in a 350°F oven for 5–7 minutes before serving.
Freezer Storage: These chips are not ideal for freezing, as the texture degrades significantly upon thawing. It’s best to make smaller, fresh batches as needed.
Meal Prep Strategy: You can drain and season the cottage cheese mixture up to 24 hours in advance. Store it covered in the refrigerator, then portion and bake fresh when ready. This cuts active prep time to under 5 minutes on snack day.
Reviving Stale Chips: If chips have lost their crunch, spread them on a baking sheet and bake at 325°F for 5–8 minutes. They’ll come back to life beautifully without burning.
Conclusion
There you have it — the ultimate guide to making perfectly crunchy, protein-packed cottage cheese chips at home. With just a few simple ingredients, minimal prep time, and endless flavor customization options, this recipe earns a permanent spot in your healthy snacking rotation.
These chips prove that eating well doesn’t mean sacrificing the foods you love. They’re crispy, savory, satisfying, and genuinely good for you — a rare combination in the snack world. Whether you’re meal prepping for the week, entertaining guests, or just craving something crunchy at 3pm, this recipe has you covered.
Now it’s your turn! Fire up that oven, grab your cottage cheese, and experience the crunch for yourself. Tried this recipe? Drop your experience in the comments below — we’d love to hear your favorite seasoning combinations and creative serving ideas. Don’t forget