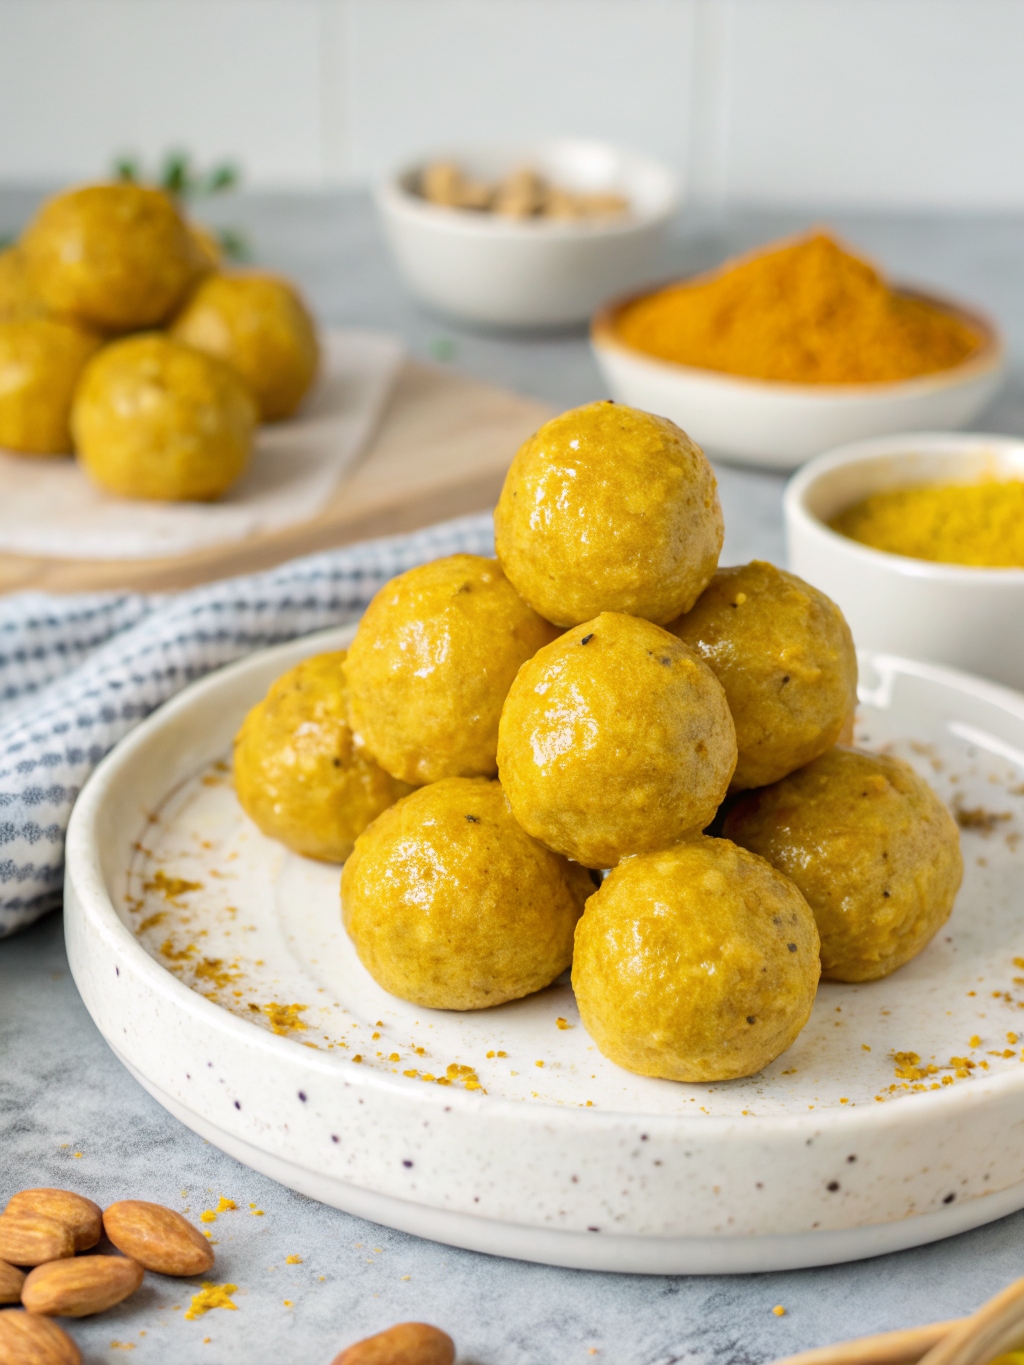
Turmeric Energy Balls Healthy Anti Inflammatory Snack
What if your afternoon snack could support your body, boost natural energy, and still taste amazing? Most people grab processed snacks or sugary bars, but there’s a much better option. These turmeric energy balls are a simple, wholesome no-bake snack made for everyday wellness.
Made with golden turmeric, oats, and naturally sweet ingredients, these turmeric energy balls fit perfectly into a balanced diet. Whether you’re looking for a nutritious snack, a plant-based energy bite, or something quick for busy days, this recipe checks every box
Why You’ll Love This Recipe
These golden bites go beyond just being a snack — these turmeric energy balls are a functional food inspired by clean eating and holistic nutrition. Turmeric is widely known for its anti-inflammatory properties and antioxidant support, making it a popular ingredient in wellness-focused diets.
Combined with fiber-rich ingredients, healthy fats, and natural sweeteners, these turmeric energy balls help maintain steady energy levels without sugar crashes. They’re perfect for healthy snacking, fitness lifestyles, and meal prep routines.
No baking required, minimal ingredients, and ready in minutes — these turmeric energy balls are ideal for anyone who wants easy homemade snacks with real nutritional value.
Ingredients List
Here’s everything you need to make a batch of approximately 14–16 turmeric energy balls. All ingredients are pantry-friendly and easy to find at any grocery store.
- 1 cup rolled oats — Use certified gluten-free oats if needed. Old-fashioned oats give the best texture.
- ½ cup natural almond butter — Peanut butter or cashew butter work just as well for a different flavor profile.
- ¼ cup raw honey — Swap with maple syrup for a fully vegan version. Medjool date paste also works beautifully.
- 1½ teaspoons ground turmeric — The star of the show! Freshly grated turmeric can be used (use 1 tablespoon).
- ½ teaspoon ground ginger — Enhances the anti-inflammatory benefits and adds a warm, spicy depth.
- ¼ teaspoon black pepper — Critical! Black pepper increases curcumin absorption by up to 2000%, according to research.
- 1 teaspoon cinnamon — Adds warmth and helps balance blood sugar levels naturally.
- 2 tablespoons chia seeds — Packed with omega-3s and fiber. Flaxseeds are an excellent alternative.
- ¼ cup mini dark chocolate chips — Optional but highly recommended. Use cacao nibs for a less sweet, antioxidant-rich option.
- 1 teaspoon pure vanilla extract — Rounds out all the flavors with a subtle sweetness.
- Pinch of sea salt — Enhances every single flavor in the mix.
Pro tip: If your mixture feels too dry, add one tablespoon of coconut oil or a splash of plant-based milk. If it’s too sticky, refrigerate for 10 minutes before rolling.
Timing
One of the best things about this recipe is how incredibly fast it is to prepare. Here’s the full breakdown:
- Prep Time: 10 minutes
- Chill Time: 20–30 minutes
- Total Time: 30–40 minutes
- Servings: 14–16 balls
Compared to the average no bake energy balls recipe that takes around 45–60 minutes (including longer chill times), this recipe is roughly 30% faster. It’s the perfect solution for meal prep Sundays or a quick weeknight snack fix.
Step-by-Step Instructions
Follow these simple steps and you’ll have a perfect batch of golden, chewy, anti-inflammatory snack balls ready in no time.
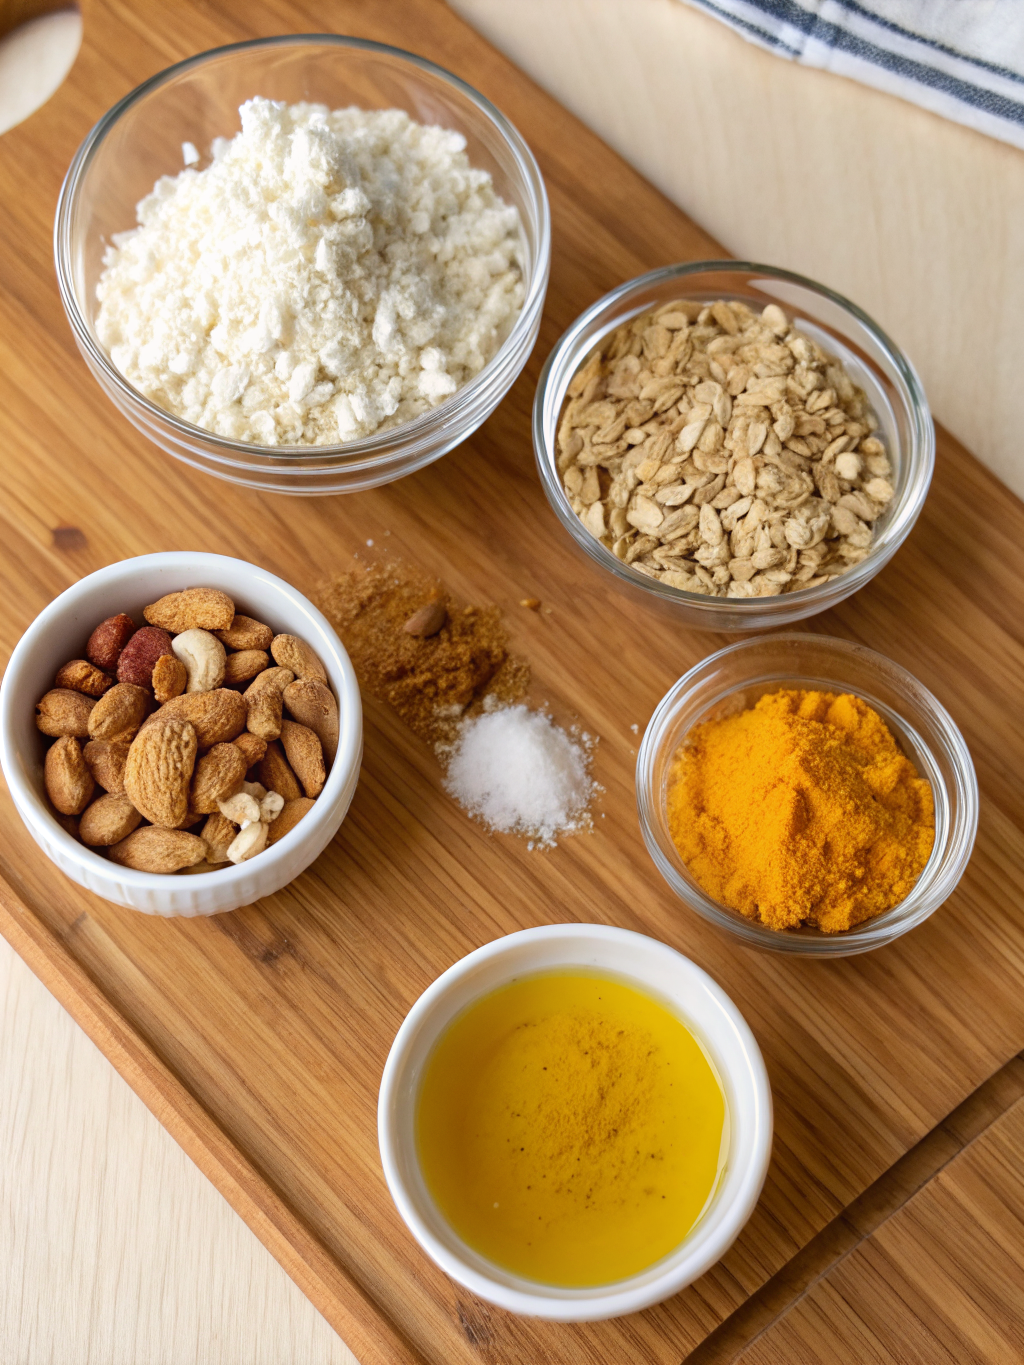
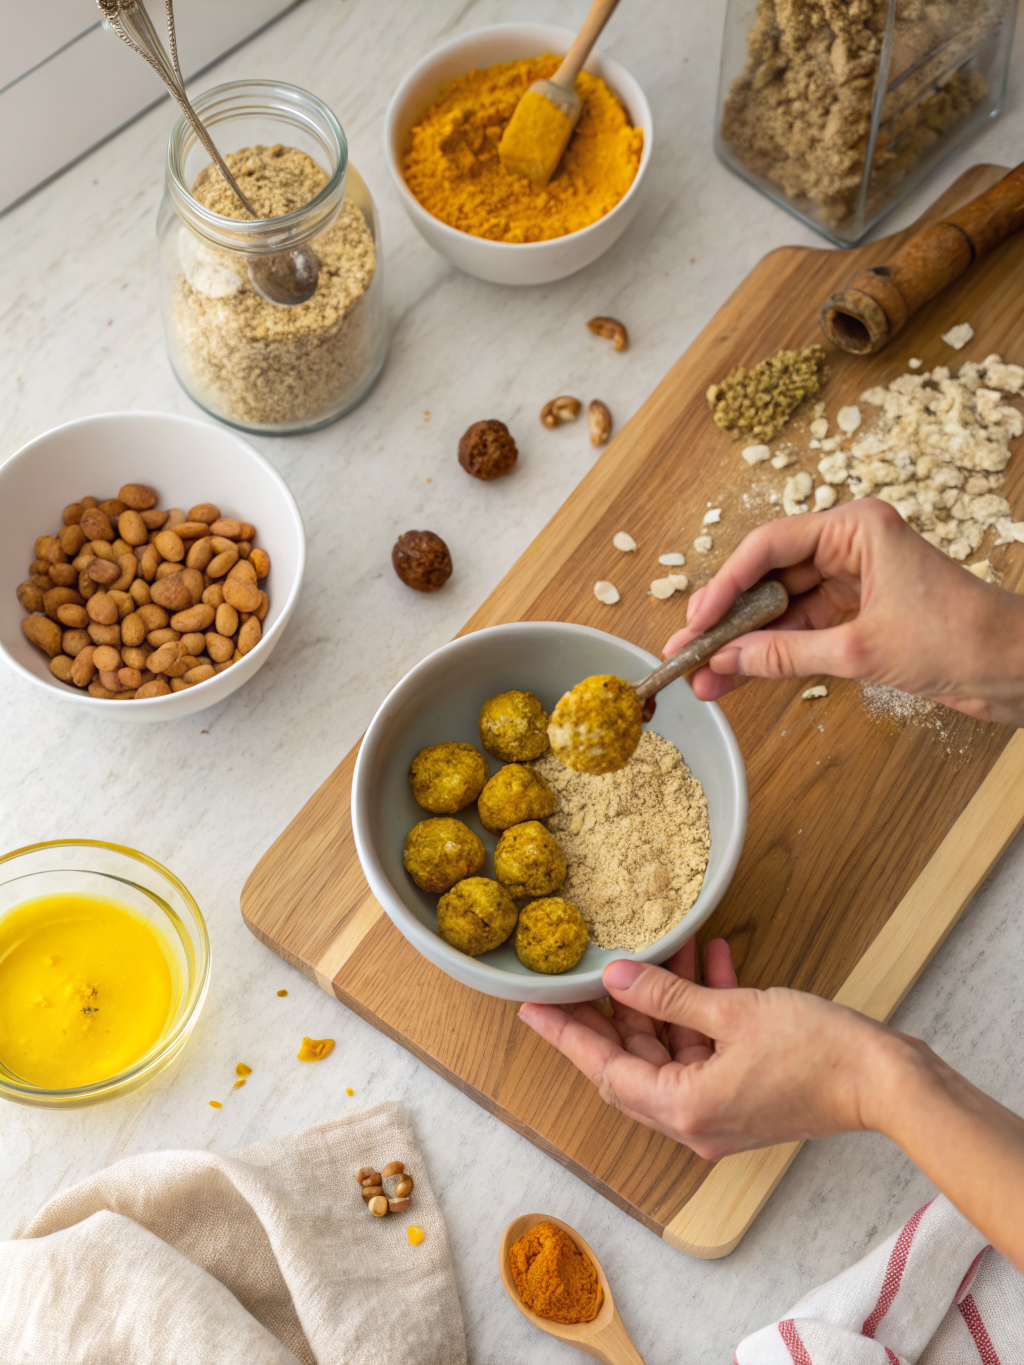
Step 1: Gather and Measure Your Ingredients
Before you begin, measure out all your ingredients and place them on the counter. This “mise en place” approach ensures a smooth, stress-free process. Having everything ready prevents over-measuring or forgetting an ingredient mid-mix.
Step 2: Combine the Dry Ingredients
In a large mixing bowl, add the rolled oats, turmeric, ginger, cinnamon, black pepper, chia seeds, and sea salt. Stir everything together with a spatula or wooden spoon until the spices are evenly distributed throughout the oats. You’ll notice the mixture turning a gorgeous golden hue.
Step 3: Add the Wet Ingredients
Pour in the almond butter, honey (or maple syrup), and vanilla extract. Mix thoroughly until everything is well combined. The mixture should be thick, slightly sticky, and hold together when pressed between your fingers. This is the texture you’re aiming for.
Step 4: Fold in the Chocolate Chips
Gently fold in the mini dark chocolate chips (or cacao nibs) using a spatula. Distribute them evenly so every ball gets a little chocolatey goodness. This step is optional but adds a delightful contrast to the earthy, spiced base.
Step 5: Chill the Mixture
Cover the bowl with plastic wrap or a plate and refrigerate for 20–30 minutes. This chilling step is essential — it firms up the mixture, making it much easier to roll into uniform balls. Don’t skip this step, or you’ll end up with sticky, misshapen bites.
Step 6: Roll Into Balls
Once chilled, use a tablespoon or small cookie scoop to portion the mixture. Roll each portion between your palms to form smooth, round balls about 1 inch in diameter. Place them on a parchment-lined baking sheet or plate as you go.
Step 7: Optional Coating
For an extra-special finish, roll the balls in shredded coconut, sesame seeds, or a light dusting of turmeric powder. This adds texture, visual appeal, and a little extra nutrition. It also makes them look stunning on a snack platter.
Step 8: Chill Again and Serve
Return the finished balls to the refrigerator for another 10 minutes to set completely. After that, they’re ready to enjoy! Serve them straight from the fridge for a firm, satisfying bite.
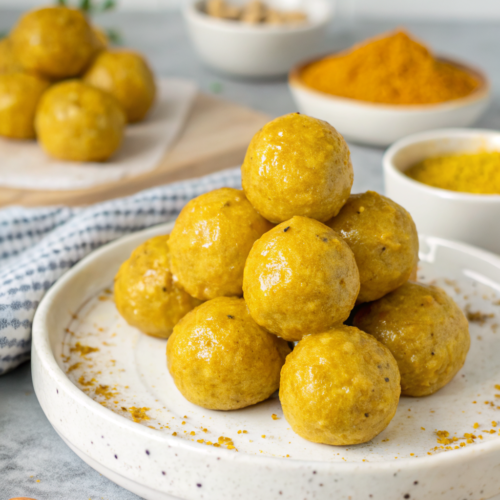
Turmeric Energy Balls
Ingredients
- 1 cup rolled oats — Use certified gluten-free oats if needed. Old-fashioned oats give the best texture.
- ½ cup natural almond butter — Peanut butter or cashew butter work just as well for a different flavor profile.
- ¼ cup raw honey — Swap with maple syrup for a fully vegan version. Medjool date paste also works beautifully.
- 1½ teaspoons ground turmeric — The star of the show! Freshly grated turmeric can be used use 1 tablespoon.
- ½ teaspoon ground ginger — Enhances the anti-inflammatory benefits and adds a warm spicy depth.
- ¼ teaspoon black pepper — Critical! Black pepper increases curcumin absorption by up to 2000% according to research.
- 1 teaspoon cinnamon — Adds warmth and helps balance blood sugar levels naturally.
- 2 tablespoons chia seeds — Packed with omega-3s and fiber. Flaxseeds are an excellent alternative.
- ¼ cup mini dark chocolate chips — Optional but highly recommended. Use cacao nibs for a less sweet antioxidant-rich option.
- 1 teaspoon pure vanilla extract — Rounds out all the flavors with a subtle sweetness.
- Pinch of sea salt — Enhances every single flavor in the mix.
Instructions
- Before you begin, measure out all your ingredients and place them on the counter. This "mise en place" approach ensures a smooth, stress-free process. Having everything ready prevents over-measuring or forgetting an ingredient mid-mix.
- In a large mixing bowl, add the rolled oats, turmeric, ginger, cinnamon, black pepper, chia seeds, and sea salt. Stir everything together with a spatula or wooden spoon until the spices are evenly distributed throughout the oats. You'll notice the mixture turning a gorgeous golden hue.
- Pour in the almond butter, honey (or maple syrup), and vanilla extract. Mix thoroughly until everything is well combined. The mixture should be thick, slightly sticky, and hold together when pressed between your fingers. This is the texture you're aiming for.
- Gently fold in the mini dark chocolate chips (or cacao nibs) using a spatula. Distribute them evenly so every ball gets a little chocolatey goodness. This step is optional but adds a delightful contrast to the earthy, spiced base.
- Cover the bowl with plastic wrap or a plate and refrigerate for 20–30 minutes. This chilling step is essential — it firms up the mixture, making it much easier to roll into uniform balls. Don't skip this step, or you'll end up with sticky, misshapen bites.
- Once chilled, use a tablespoon or small cookie scoop to portion the mixture. Roll each portion between your palms to form smooth, round balls about 1 inch in diameter. Place them on a parchment-lined baking sheet or plate as you go.
- For an extra-special finish, roll the balls in shredded coconut, sesame seeds, or a light dusting of turmeric powder. This adds texture, visual appeal, and a little extra nutrition. It also makes them look stunning on a snack platter.
- Return the finished balls to the refrigerator for another 10 minutes to set completely. After that, they're ready to enjoy! Serve them straight from the fridge for a firm, satisfying bite.
Nutritional Information
The following nutritional values are approximate and based on a batch of 16 balls, with each ball being one serving. Values may vary slightly based on specific brands and ingredient swaps used.
- Calories: 115 kcal per ball
- Total Fat: 6g (primarily healthy monounsaturated fats from almond butter)
- Carbohydrates: 13g
- Dietary Fiber: 2g
- Natural Sugars: 6g
- Protein: 3g
- Sodium: 35mg
- Iron: 8% DV (thanks to oats and chia seeds)
- Calcium: 5% DV
These bites are a nutritional powerhouse. Curcumin in turmeric has been shown in over 12,000 peer-reviewed studies to support joint health, reduce oxidative stress, and improve brain function. Paired with omega-3-rich chia seeds and slow-digesting oats, these snacks support long-lasting energy and gut health.
Healthier Alternatives for the Recipe
This recipe is already quite clean, but there are several easy swaps to tailor it to your specific dietary goals or preferences.
- Lower sugar version: Replace honey with unsweetened applesauce or mashed ripe banana. This reduces the glycemic load while keeping the mixture moist and naturally sweet.
- Higher protein version: Add 2 tablespoons of your favorite vanilla or unflavored protein powder. You may need to add a splash of almond milk to compensate for the added dryness.
- Nut-free version: Swap almond butter for sunflower seed butter (SunButter). It’s allergy-friendly and has a mild, pleasant flavor that pairs well with turmeric.
- Keto-friendly version: Replace oats with unsweetened shredded coconut and hemp seeds. Use sugar-free maple syrup and keto chocolate chips to keep carbs low.
- Boost the anti-inflammatory power: Add ½ teaspoon of ashwagandha powder or a teaspoon of maca powder for adaptogenic benefits alongside the turmeric.
Serving Suggestions
These golden bites are incredibly versatile and work beautifully in a variety of settings. Here are some creative ways to enjoy and present them.
- Post-workout snack: Pair two balls with a glass of cold almond milk for a quick recovery snack that replenishes glycogen and reduces exercise-induced inflammation.
- Lunchbox addition: Pack 2–3 balls alongside fresh fruit and veggie sticks for a balanced, school-friendly lunch. Kids love the subtle sweetness and chocolate chips.
- Afternoon energy boost: Enjoy one or two balls with a cup of golden milk latte or green tea around 3 PM to beat the midday slump naturally.
- Dessert alternative: Serve on a small board with fresh berries, dark chocolate squares, and nuts for a beautiful, healthy dessert platter at dinner parties.
- Breakfast on-the-go: Grab three balls and pair with a banana for a complete, satisfying breakfast when you’re rushing out the door in the morning.
Common Mistakes to Avoid
Even a simple no-bake recipe has its pitfalls. Here are the most common mistakes people make with this recipe and exactly how to avoid them.
- Skipping the black pepper: This is the most critical mistake. Without black pepper, curcumin absorption drops dramatically. Always include it, even if it seems unusual in a sweet snack.
- Not chilling before rolling: Trying to roll warm, sticky mixture results in misshapen, frustrating balls. Always chill for at least 20 minutes. Patience pays off here.
- Using quick oats instead of rolled oats: Quick oats create a mushy, dense texture. Rolled oats provide the ideal chewy, hearty bite that holds together perfectly.
- Over-measuring the turmeric: Too much turmeric makes the balls bitter and overpowering. Stick to 1½ teaspoons unless you’re a serious turmeric lover — then go up to 2 teaspoons maximum.
- Using natural nut butter that’s too oily: If your almond butter has separated and is very oily, stir it well before measuring. Excess oil makes the mixture too loose to hold its shape.
- Not tasting before rolling: Always taste the mixture before chilling. Adjust sweetness, spice level, or salt to your preference. It’s much easier to fix before the balls are formed.
Storing Tips for the Recipe
Proper storage keeps your turmeric energy balls fresh, delicious, and ready to grab whenever hunger strikes. Here’s how to store them like a pro.
Refrigerator: Store these turmeric energy balls in an airtight container in the refrigerator for up to 7 days. Place a piece of parchment paper between layers to prevent sticking. These turmeric energy balls actually taste better on day two as the flavors meld together beautifully.
Freezer: These turmeric energy balls freeze exceptionally well. Place them on a parchment-lined tray and freeze for 1–2 hours until solid, then transfer to a freezer-safe zip-lock bag or container. These turmeric energy balls will keep for up to 3 months. Thaw in the fridge overnight or at room temperature for 15 minutes before eating.
Meal prep tip: Double the batch on Sunday and store half of these turmeric energy balls in the fridge and half in the freezer. This gives you a full two weeks of healthy snacks with just one 20-minute prep session.
Avoid room temperature storage: Because of the nut butter and honey content, these turmeric energy balls should not be left at room temperature for more than 2 hours, especially in warm climates.
Conclusion
These turmeric energy balls are proof that healthy snacking doesn’t have to be boring, complicated, or time-consuming. With just 10 minutes of prep, a handful of wholesome ingredients, and zero baking required, you get a snack that nourishes your body, fights inflammation, and genuinely satisfies your cravings.
From the anti-inflammatory power of turmeric and ginger to the sustained energy from oats and almond butter, every single ingredient earns its place in this recipe. They’re gluten-free adaptable, vegan-friendly with one simple swap, and endlessly customizable to suit your taste and dietary needs.
Whether you’re meal