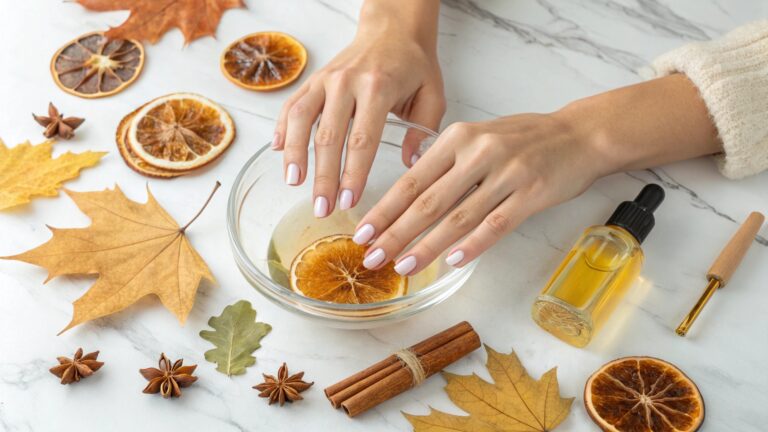
Fall-Inspired DIY Nail Scrubs: Your Secret Weapon
Look, I get it. Summer’s over, and your nails are looking a little… rough. Maybe they’re peeling, brittle, or just dull and lifeless. Whatever the case, fall is the perfect season to revive your nails with Fall-Inspired DIY nail scrubs made from simple ingredients you probably already have in your kitchen.
I’ve been mixing up Fall-Inspired DIY nail scrubs for years, and honestly? Store-bought products can’t compete. There’s something so satisfying about whipping up a natural nail scrub while cozying up with a blanket, sipping tea, and watching the autumn leaves fall outside your window.
Why Your Nails Are Begging for a Fall Scrub
Ever notice how your nails go from summer-ready to winter-disaster mode almost overnight? Yeah, me too.
Cooler weather strips away moisture fast, and constant hand-washing during flu season only makes it worse. That’s why your nail beds feel dry, cuticles look ragged, and nails start splitting. The good news? Fall-Inspired DIY nail scrubs are the ultimate solution. By exfoliating dead skin, boosting circulation, and nourishing with seasonal ingredients, these scrubs work like a mini spa treatment for your fingertips—without the hefty price tag.
The Magic Behind Fall-Inspired DIY Nail Scrubs
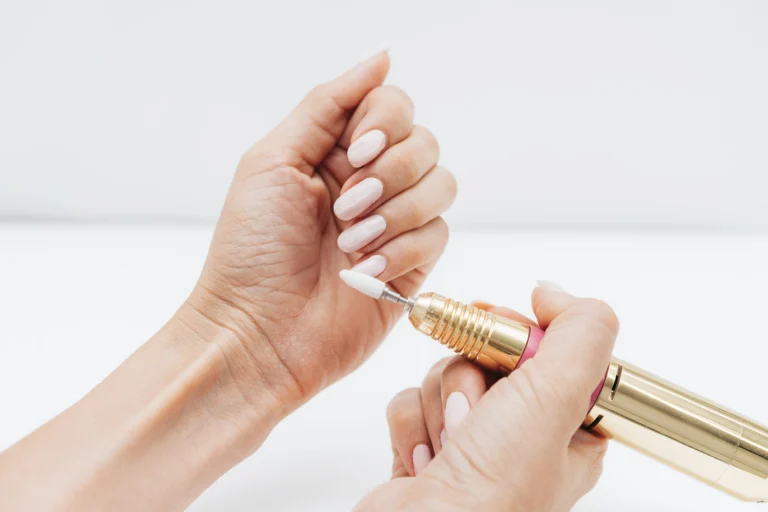
Here’s the deal: DIY nail scrubs aren’t just about pretty hands. They physically buff away dead skin cells around your cuticles and nail beds, allowing your nails to better absorb moisture and nutrients.
What makes Fall-Inspired DIY nail scrubs extra powerful is the autumn ingredients. Pumpkin is packed with vitamins A and C for strength. Brown sugar provides gentle exfoliation. Cinnamon stimulates blood flow for healthier nail growth. Even a little honey can lock in hydration, keeping your nails glossy and smooth.
According to experts at Byrdie, exfoliation and moisturization are key foundations of nail health. Once I started using Fall-Inspired DIY nail scrubs consistently, my nails grew faster, looked stronger, and stopped breaking at the drop of a hat.
Top Autumn Ingredients That Actually Work
Brown Sugar
This is my go-to exfoliant. Brown sugar is coarse enough to slough off dead skin but gentle enough that you won’t scratch yourself up. Plus, it’s got natural glycolic acid, which helps with cell turnover.
Why it rocks: Dissolves gradually, so you get a longer scrubbing session without it turning into a gritty mess.
Pumpkin Puree
I know, I know—pumpkin everything is a cliché at this point. But hear me out. Pumpkin puree contains enzymes that naturally exfoliate while vitamins A, C, and E nourish your nail beds. It’s like a multivitamin for your fingertips.
Pro tip: Use fresh or canned pure pumpkin, not pumpkin pie filling. Trust me on this one.
Cinnamon
This spice does more than make your kitchen smell amazing. Cinnamon stimulates circulation, which means more nutrients reaching your nails. It also has antimicrobial properties that keep nasty nail infections at bay.
Warning: A little goes a long way. Too much cinnamon can irritate sensitive skin, so start small.
Honey
Raw honey is basically nature’s miracle worker. It pulls moisture into your skin, fights bacteria, and helps your nails stay flexible instead of brittle. I always keep a jar handy for my fall-inspired DIY nail scrubs.
Coconut Oil
This ingredient needs no introduction. Coconut oil penetrates deeply to moisturize while its lauric acid content fights fungal growth. FYI, this is especially important in fall when damp weather creates the perfect environment for nail fungus.
Apple Cider Vinegar
Okay, hear me out before you wrinkle your nose. ACV balances pH levels and strengthens weak nails. Just dilute it properly, and you’ll see why it’s a fall staple in my nail care routine.
For more comprehensive nail care strategies, check out this nail care guide that covers everything from strengthening treatments to creative designs.
My Favorite Fall-Inspired DIY Nail Scrub Recipes
Recipe 1: Pumpkin Spice Everything Scrub
Ingredients:
- 3 tablespoons brown sugar
- 2 tablespoons pumpkin puree
- 1 tablespoon coconut oil (melted)
- 1/2 teaspoon cinnamon
- 1 teaspoon honey
How to make it:
Mix everything in a small bowl until you get a thick, gritty paste. The consistency should be similar to wet sand—not too runny, not too dry.
How to use it:
Scoop about a tablespoon and massage it into your nails and cuticles using circular motions. Spend at least 2-3 minutes on each hand. Seriously, don’t rush this part. The massage action is where the magic happens.
Rinse with warm water and pat dry. Follow up with cuticle oil or hand cream.
I make this scrub every Sunday during fall, and it’s become my favorite self-care ritual. My nails have never looked better, IMO.
Recipe 2: Apple Harvest Renewal Scrub
Ingredients:
- 2 tablespoons brown sugar
- 1 tablespoon apple cider vinegar
- 1 tablespoon olive oil
- 1 teaspoon lemon juice
- 5 drops vitamin E oil
How to make it:
Combine all ingredients and stir well. The mixture might separate slightly—that’s normal. Just give it a quick stir before each use.
How to use it:
Apply to clean, dry nails and scrub for 2-3 minutes per hand. The apple cider vinegar might tingle slightly, but if it burns, you’ve got a cut somewhere. Rinse immediately if that happens.
This scrub is perfect for yellowed or stained nails. The lemon juice brightens while the ACV strengthens. I use this one after removing dark nail polish.
Recipe 3: Honey Cinnamon Silk Scrub
Ingredients:
- 2 tablespoons fine white sugar
- 1 tablespoon raw honey
- 1 tablespoon sweet almond oil
- 1/4 teaspoon cinnamon
- 3 drops tea tree oil (optional)
How to make it:
Warm the honey slightly in the microwave (like 5 seconds) to make mixing easier. Combine with other ingredients until smooth.
How to use it:
This scrub is gentler than the others, so it’s great for sensitive skin or if you’ve been overzealous with your nail care lately :/
Massage onto nails and cuticles, let it sit for 5 minutes, then gently scrub and rinse. The honey creates a silky texture that feels luxurious.
According to InStyle’s beauty experts, combining exfoliation with moisturizing treatments gives you the best results. This scrub does exactly that.
Recipe 4: Sweet Potato Recovery Scrub
Ingredients:
- 2 tablespoons mashed sweet potato (cooked)
- 2 tablespoons brown sugar
- 1 tablespoon coconut oil
- 1/2 teaspoon ground ginger
- 1 capsule vitamin E (pierced and squeezed out)
How to make it:
Mash your sweet potato until it’s completely smooth—no chunks. Mix with remaining ingredients until well combined.
How to use it:
This one’s thicker and more nourishing. Apply generously and scrub for 3-4 minutes per hand. Leave it on for an additional 5 minutes before rinsing.
I save this scrub for when my nails are seriously damaged. The biotin in sweet potatoes combined with the warming ginger works wonders.
Storage Tips That’ll Save Your Life
Nobody wants moldy scrubs. Been there, done that, threw out the container.
Store your fall-inspired DIY nail scrubs properly:
- Use clean, airtight containers (small mason jars work perfectly)
- Keep them in the fridge if they contain fresh ingredients like pumpkin or sweet potato
- Label with the date—most scrubs last 1-2 weeks refrigerated
- If you see any discoloration or smell anything funky, toss it immediately
Want to make larger batches? Skip the fresh ingredients and stick to sugar, oils, and spices. These dry/oil-based scrubs can last several months at room temperature.
How Often Should You Actually Use These?
Look, more isn’t always better. I learned this the hard way when I scrubbed my cuticles raw trying to speed up results.
The sweet spot: 2-3 times per week for most people. If your nails are severely damaged, you might start with once weekly and work your way up.
Best timing: Evening applications work great because you can follow up with overnight moisturizing. I pop on cotton gloves after applying hand cream, and my nails drink up all that goodness while I sleep.
You should notice softer cuticles immediately. Stronger, healthier nails take about 3-4 weeks of consistent use. Remember, nail growth is slow, so patience is key.
Common Mistakes Everyone Makes
Over-Scrubbing
Your nails aren’t dirty dishes. Aggressive scrubbing damages the nail bed and irritates cuticles. Gentle circular motions for 2-3 minutes max is all you need.
Skipping Moisturizer
Fall-inspired DIY nail scrubs exfoliate, but they don’t provide long-lasting moisture on their own. Always follow up with cuticle oil or hand cream. This step is non-negotiable.
Using Scrubs on Damaged Cuticles
Got cuts, hangnails, or infected cuticles? Skip the scrub until they heal. You’ll just make things worse and probably yelp in pain. Ask me how I know.
Ignoring the Rest of Your Hands
Why stop at your nails? While you’ve got the scrub out, treat your whole hand. Your knuckles and palms will thank you.
Pairing Scrubs with Nail Art
Once your fall-inspired DIY nail scrubs transform your nails into healthy, strong canvases, you’ll want to show them off. Fall nail art is having a moment right now, and for good reason.
Strong nails hold polish better and make any design pop. Check out these creative nail art ideas that look absolutely stunning against autumn’s color palette.
I personally love doing deep burgundy or burnt orange designs after my Sunday scrub sessions. The contrast against healthy, buffed nails is chef’s kiss.
Beyond the Scrub: Complete Fall Nail Care
Fall-inspired DIY nail scrubs are amazing, but they’re just one piece of the puzzle. Want to level up your nail game even more?
Add these to your routine:
- Wear gloves when doing dishes or cleaning—harsh chemicals are nail killers
- Keep a nail file handy to smooth rough edges before they turn into breaks
- Apply base coat before polish to prevent staining
- Drink plenty of water (yes, even when it’s cold outside)
- Take biotin supplements if your nails are chronically weak
The combination of external care (scrubs) and internal support (hydration, supplements) creates nails that can actually survive winter without looking like they’ve been through a shredder.
Why DIY Beats Store-Bought Every Time
Ever read the ingredient list on commercial nail scrubs? Half of it sounds like a chemistry experiment. Parabens, sulfates, synthetic fragrances—no thanks.
DIY advantages:
- You know exactly what’s going onto your skin
- Costs a fraction of retail prices
- Customizable to your specific needs
- Fresh ingredients = maximum potency
- Zero weird preservatives or chemicals
Plus, there’s something genuinely satisfying about creating your own beauty products. It makes you feel like a skincare wizard, and who doesn’t want that?
Final Thoughts: Your Nails Deserve This
Here’s the truth: fall-inspired DIY nail scrubs aren’t just trendy—they’re practical, effective, and honestly kind of fun to make. Your nails face serious challenges during autumn and winter, and a little preventive care goes a long way.
I’ve tried countless nail treatments over the years, and these homemade scrubs consistently outperform expensive salon treatments. The secret? Fresh, nutrient-rich ingredients applied consistently.
Start with one recipe this week. Pick whichever sounds most appealing (though I’m partial to the Pumpkin Spice Everything Scrub, obviously). Give it three weeks of regular use, and I guarantee you’ll notice a difference.
Your nails are about to become the envy of everyone at Thanksgiving dinner. You’re welcome.